 Piaggio MP3 300 HPE - Owner's Manual > Fuses
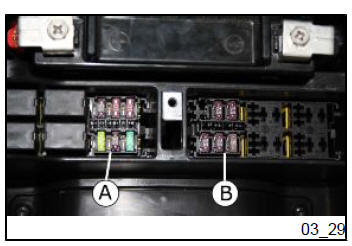
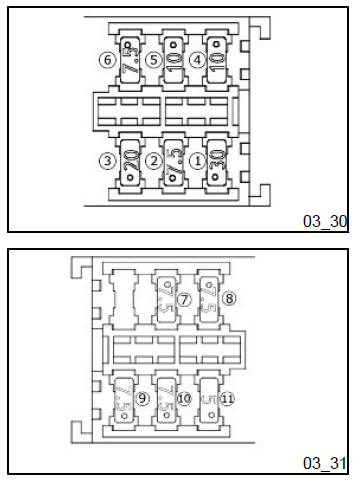
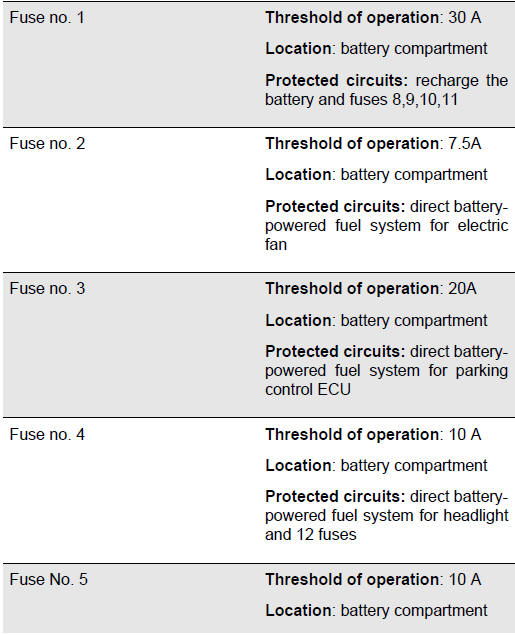
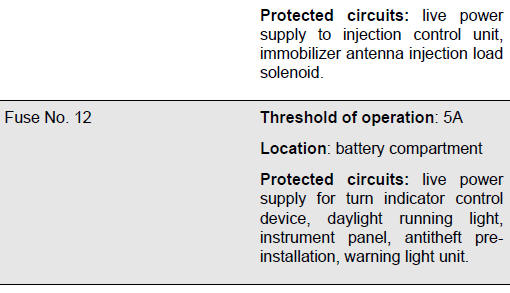
The electrical system is equipped with eleven fuses to protect the different circuits, subdivided into two fuse boxes "A" and "B", located inside the battery compartment.
The chart shows the position and specifications of the fuses in the vehicle.
CAUTION
 BEFORE REPLACING A BLOWN
FUSE, FIND AND SOLVE THE FAILURE THAT CAUSED IT TO BLOW. NEVER TRY TO REPLACE
THE FUSE WITH ANY OTHER MATERIAL (E.G., A PIECE OF ELECTRIC WIRE).
BEFORE REPLACING A BLOWN
FUSE, FIND AND SOLVE THE FAILURE THAT CAUSED IT TO BLOW. NEVER TRY TO REPLACE
THE FUSE WITH ANY OTHER MATERIAL (E.G., A PIECE OF ELECTRIC WIRE).
FUSES

BULBS
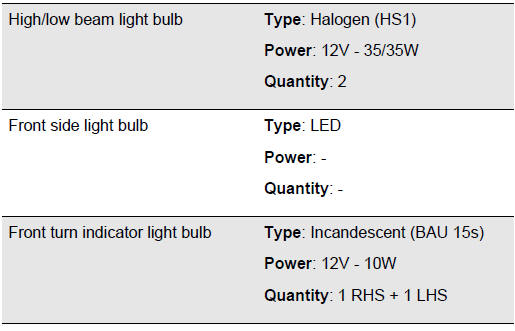
Front light group

Remove the windshield top fairing retaining the 4 indicated screws (2 each side).
- Remove the rubber cover.
- Remove the top fairing supports retaining the indicated screws and paying attention to the requested spacers.
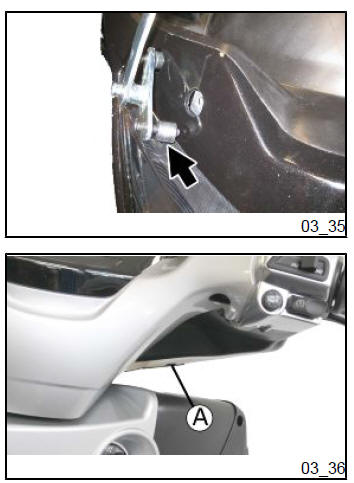
- Remove the 2 screws "A" right and left at the back of the handlebar.
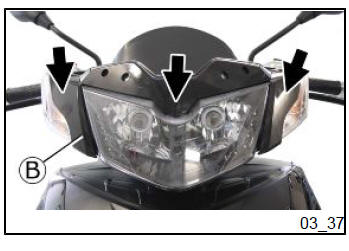
- Remove the head lamp surround "B"
WARNING!: the surround is fastened, where indicated in the figure, with the trigger slots. Pay attention, during the removal to not damage them or even break them.
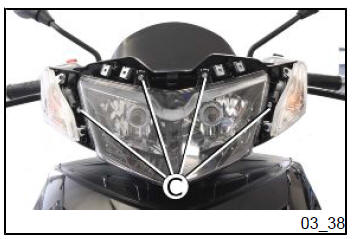
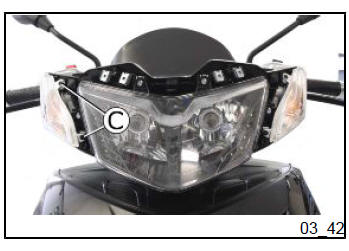
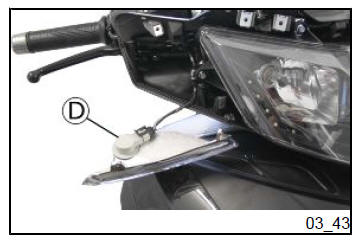
- Remove the 4 fixing screws "C" of the front light unit.
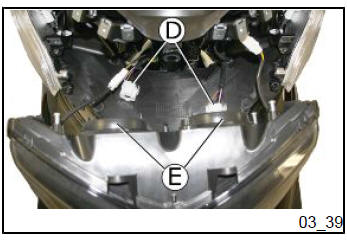
- Remove the headlight. Remove the bulb connectors "D" and access the bulbs by removing the rubber cover "E".
WARNING
HIGH- AND LOW-BEAM BULBS
ARE HALOGEN TYPE: DO NOT TOUCH THEM WITH YOUR FINGERS TO AVOID DAMAGING THEIR
FUNCTION.
Headlight adjustment
Proceed as follows:
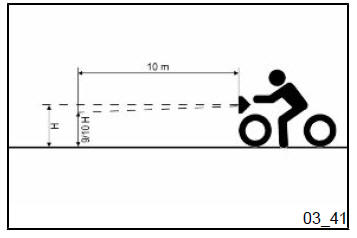
1. Position the unloaded vehicle, in running order and with the tyres inflated to the prescribed pressure, on a flat surface 10 m away from a half-lit white screen; ensure that the longitudinal axis of the vehicle is perpendicular to the screen;
2. Turn on the headlight and check that the borderline of the projected light beam is lower than 9/10 and higher than 7/10 of the distance from the ground to the centre of the vehicle headlight;
3. Otherwise, adjust the headlight with the screw "A" indicated in the figure
To carry out this operation, it is not necessary to remove any cover.
N.B.
THE ABOVE PROCEDURE COMPLIES WITH THE EUROPEAN STANDARDS REGARDING MAXIMUM AND MINIMUM HEIGHT OF LIGHT BEAMS. REFER TO THE STATUTORY REGULATIONS IN FORCE IN EVERY COUNTRY WHERE THE VEHICLE IS USED.
Front direction indicators
- Remove the top fairing and the headlamp surround.
For the removal procedure, refer to the paragraph regarding the Front Headlight Assembly.
- Remove the two fixing screws "C" and detach the turn indicator.
- Access the bulb by removing the bulb holder "D".
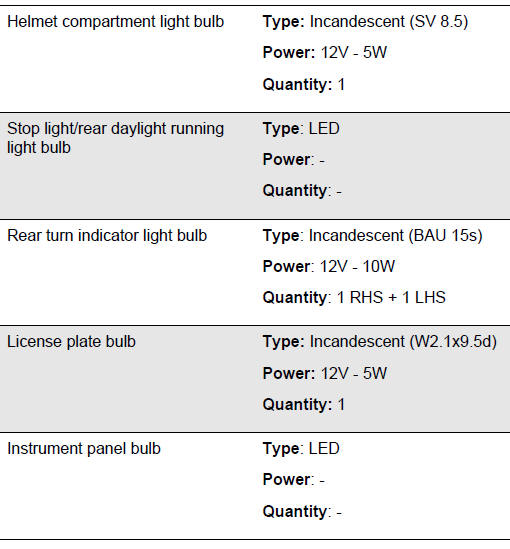
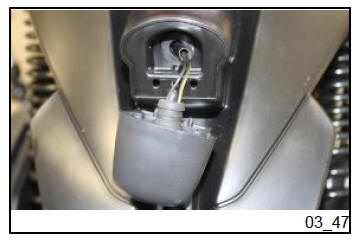
Rear turn indicators

To access the rear turn indicator bulb proceed as follows:
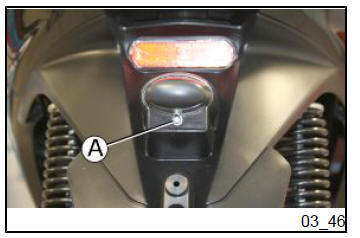
- Lift the seat to access the helmet compartment
- Remove the rubber cover "A"

- Remove the bulb holder" B" to access the rear turn indicator bulb.
For the refit, re-insert the rubber cover "A", pay attention to the correct positioning so as to avoid water or dust entering the helmet compartment.
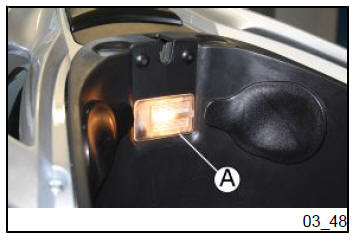
Number plate light
- Remove the screw "A" shown in the figure.
- Detach the license plate light and remove the bulb.
Helmet compartment lighting bulb
Open the seat compartment and insert a small plain slot screwdriver in the lateral notch to detach the snap-on glass "A", then replace the bulb.
Rear-view mirrors
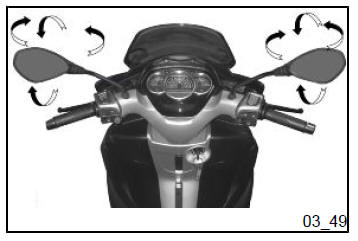
The mirrors can be set to the desired position by adjusting the mirror frame.
See also:
 Piaggio MP3 300 HPE - Owner's Manual > Checking the brake oil level
The front and rear brake fluid reservoirs are both positioned on the handlebar. Proceed as follows:
Piaggio MP3 300 HPE - Owner's Manual > Front and rear disc brake
The brake disc and pad wear is automatically compensated, therefore it has no effect on the functioning of the front and rear brakes. For this reason it is not necessary to adjust the brakes. An excessively elastic brake lever stroke may indicate the presence of air in the braking circuit or a failure in the braking system. In this case, mainly due to the importance of brakes to guarantee safe riding conditions, the vehicle should be taken to an Authorised Service Centre or Dealer.


