 Yamaha XMAX YP125R - Service manual > Important information
Preparation for removal and disassembly
1. Before removal and disassembly, remove all dirt, mud, dust and foreign material.
2. Use only the proper tools and cleaning equipment.
Refer to "SPECIAL TOOLS" .
3. When disassembling, always keep mated parts together. This includes gears, cylinders, pistons and other parts that have been "mated" through normal wear. Mated parts must always be reused or replaced as an assembly.
4. During disassembly, clean all of the parts and place them in trays in the order of disassembly.
This will speed up assembly and allow for the correct installation of all parts.
5. Keep all parts away from any source of fire.
Replacement parts
Use only genuine Yamaha parts for all replacements.
Use oil and grease recommended by Yamaha for all lubrication jobs. Other brands may be similar in function and appearance, but inferior in quality.
Gaskets, oil seals and o-rings
1. When overhauling the engine, replace all gaskets, seals and O-rings. All gasket surfaces, oil seal lips and O-rings must be cleaned.
2. During reassembly, properly oil all mating parts and bearings and lubricate the oil seal lips with grease.
- Oil
- Lip
- Spring
- Grease
Lock washers/plates and cotter pins
After removal, replace all lock washers/plates "1" and cotter pins. After the bolt or nut has been tightened to specification, bend the lock tabs along a flat of the bolt or nut.
Bearings and oil seals
Install bearings "1" and oil seals "2" so that the manufacturer's marks or numbers are visible.
When installing oil seals, lubricate the oil seal lips with a light coat of lithium-soap-based grease. Oil bearings liberally when installing, if appropriate.
NOTICE
Do not spin the bearing with compressed air because this will damage the bearing surfaces.
Circlips
Before reassembly, check all circlips carefully and replace damaged or distorted circlips. Always replace piston pin clips after one use.
When installing a circlip "1", make sure the sharp-edged corner "2" is positioned opposite the thrust "3" that the circlip receives.
Checking the connections
Check the leads, couplers, and connectors for stains, rust, moisture, etc.
1. Disconnect:
- Lead
- Coupler
- Connector
2. Check:
- Lead
- Coupler
- Connector
Moisture → Dry with an air blower.
Rust/stains → Connect and disconnect several times.
3. Check:
- All connections
Loose connection → Connect properly.
TIP
If the pin "1" on the terminal is flattened, bend it up.
4. Connect:
- Lead
- Coupler
- Connector
TIP
Make sure all connections are tight.
5. Check:
- Continuity (with the pocket tester)
 Pocket tester
90890-03112
Analog pocket tester
YU-03112-C
TIP
- If there is no continuity, clean the terminals.
- When checking the wire harness, perform steps (1) to (3).
- As a quick remedy, use a contact revitalizer available at most part stores.
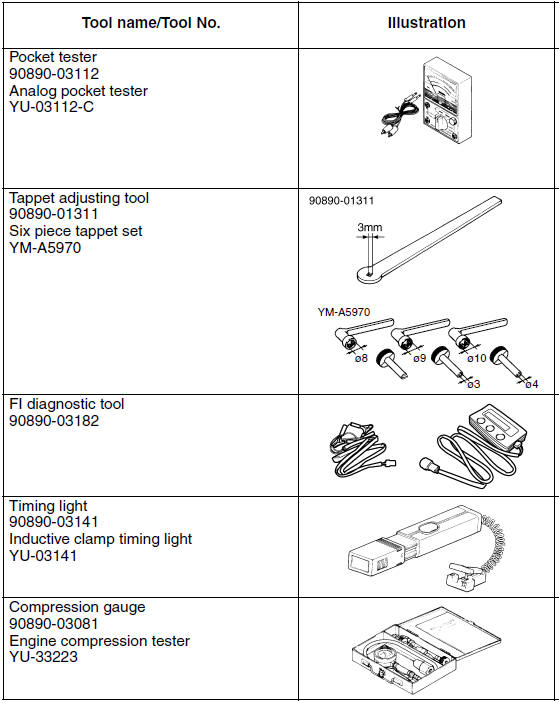
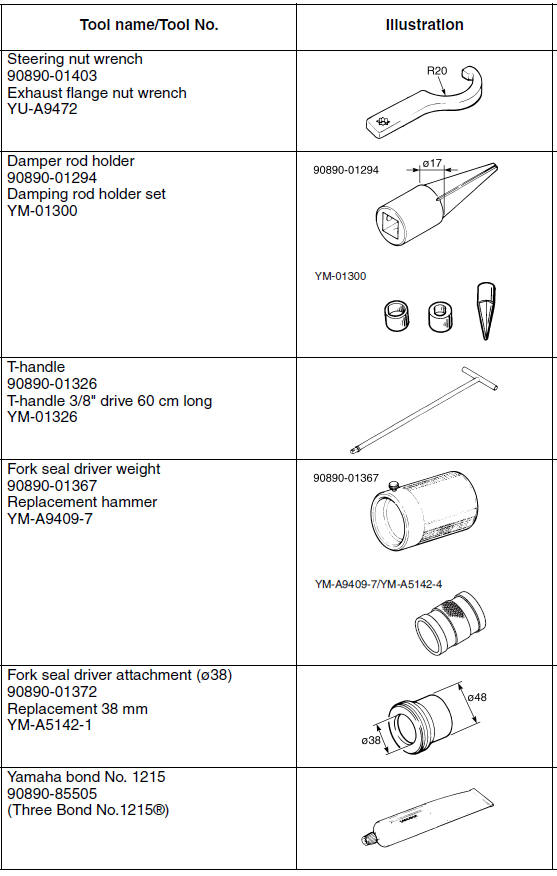
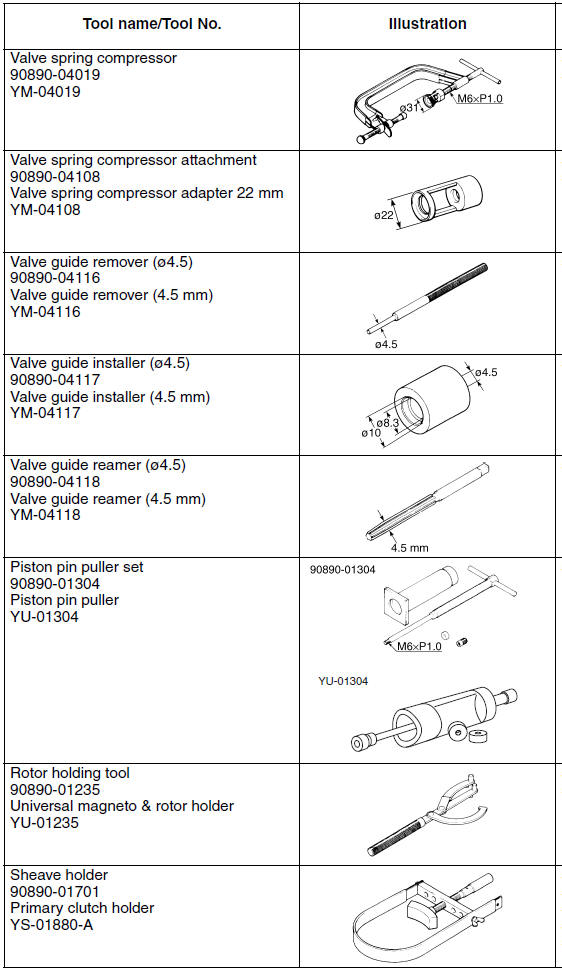
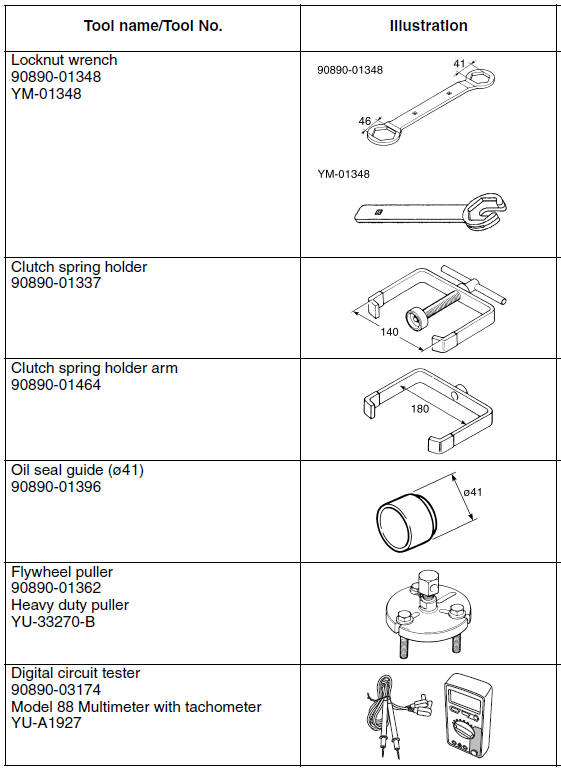
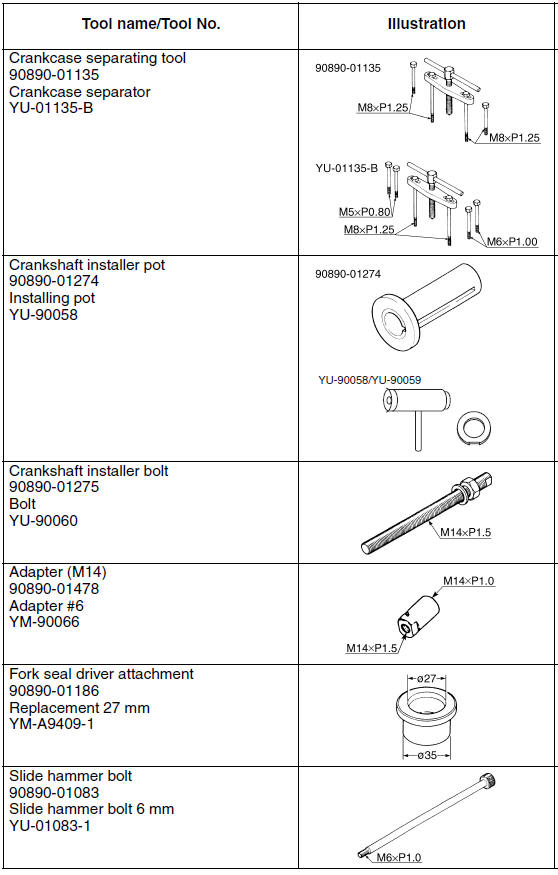
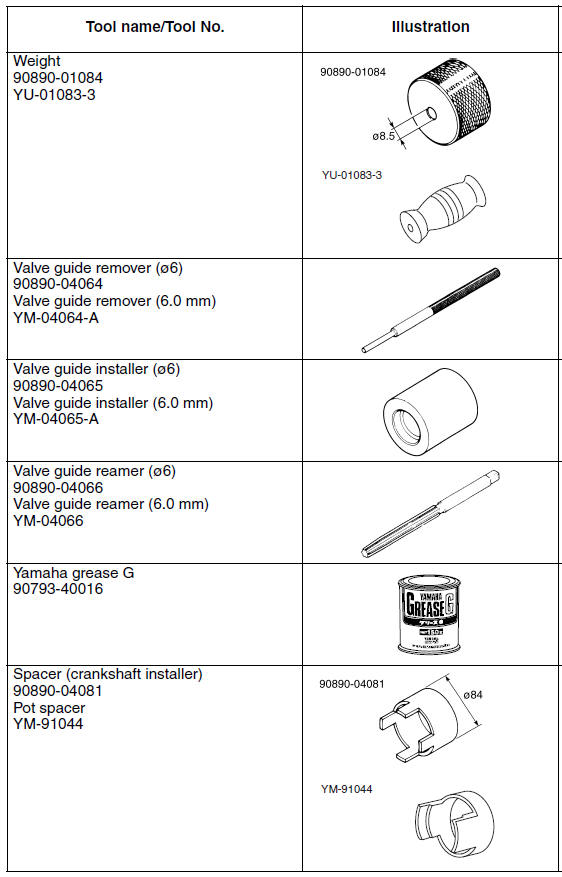
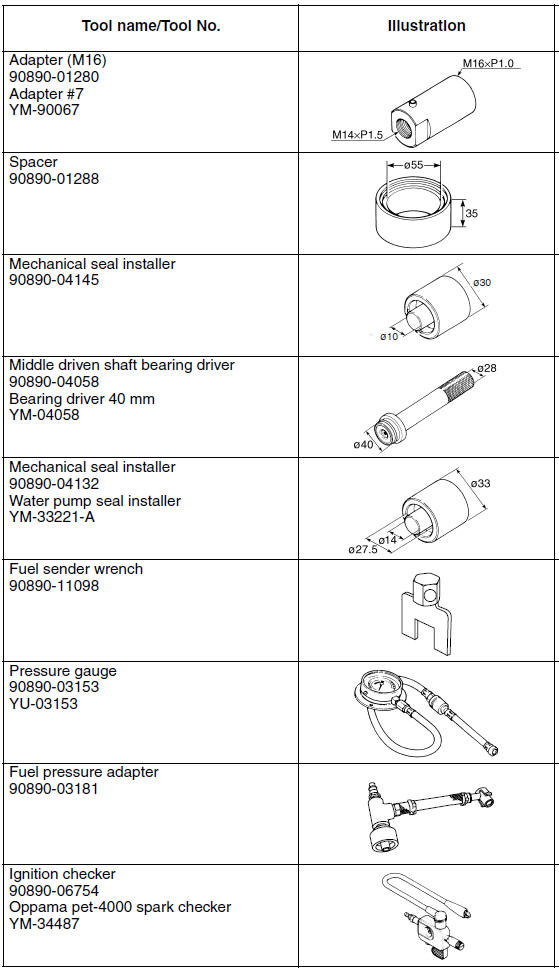
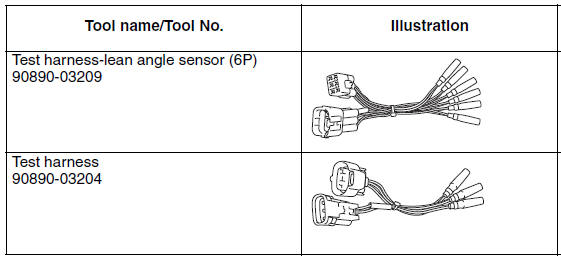
Special tools
The following special tools are necessary for complete and accurate tune-up and assembly. Use only the appropriate special tools as this will help prevent damage caused by the use of inappropriate tools or improvised techniques. Special tools, part numbers or both may differ depending on the country.
When placing an order, refer to the list provided below to avoid any mistakes.
TIP
- For U.S.A. and Canada, use part numbers starting with "YM-", "YU-", or "ACC-".
- For others, use part numbers starting with "90890-".
See also:
 Yamaha XMAX YP125R - Service manual > Coolant temperature meter
With the key in the "ON" position, the coolant temperature meter indicates the temperature of the coolant. The coolant temperature varies with changes in the weather and engine load. If the top segment and coolant temperature warning indicator flash, stop the vehicle and let the engine cool.
Yamaha XMAX YP125R - Service manual > Specifications
General specifications (YP125R) Engine specifications (YP125R)


