 Suzuki Burgman 400 - Service manual > Repair Instructions
Front Fork Components
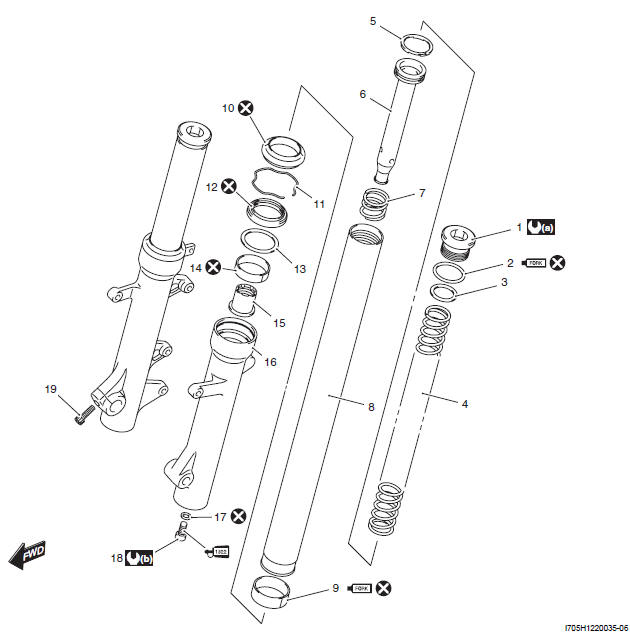
- Front fork top cap
- O-ring
- Washer
- Front fork spring
- Cylinder ring
- Cylinder
- Rebound spring
- Inner tube
- Inner tube slide metal
- Dust seal
- Oil seal stopper ring
- Oil seal
- Oil seal retainer
- Guide metal
- Oil lock piece
- Outer tube
- Gasket
- Cylinder bolt
- Front axle pinch bolt
 a : 45 N*m (4.5 kgf-m,
32.5 lb-ft)
a : 45 N*m (4.5 kgf-m,
32.5 lb-ft)
b : 30 N*m (3.0 kgf-m,
21.5 lb-ft)
 : Apply thread lock
to thread part.
: Apply thread lock
to thread part.
 : Apply fork oil.
 : Do not reuse.
Front Fork Removal and Installation
Removal
1) Remove the front leg shield. Refer to "Front Leg Shield Removal and Installation".
2) Remove the front wheel assembly. Refer to "Front Wheel Assembly Removal and Installation".
! CAUTION
- Make sure that the motorcycle is supported securely.
- Do not operate the front brake lever with the front wheel removed.
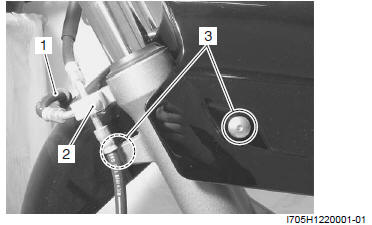
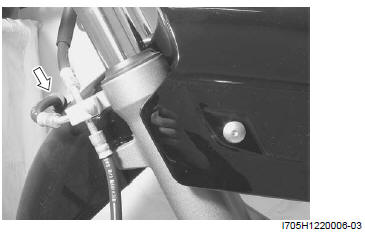
3) Disconnect the brake hose clamp (1) from the front fender.
4) Remove the brake hose clamp bolt (2).
5) Remove the front fender by removing the bolts (3) (L & R).
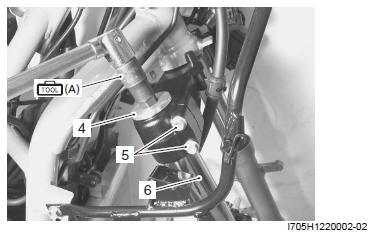
6) Remove the front fork cap bolt (4) and washer using the special tool.
! CAUTION Use caution when removing the front fork cap bolt since the spring force is applied to the cap bolt.
Special tool (A): 09940-30230 (Socket hexagon (17 mm) )
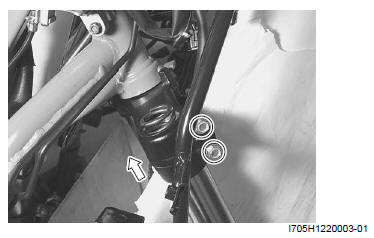
7) Loose the front fork clamp bolts (5) and remove the front fork (6).
NOTE Hold the front fork by the hand to prevent sliding out of the steering stem.
Installation
1) Insert the front fork inner tube top end into the steering stem all the way until the step of mounting hole has been contacted and tighten the clamp bolts temporarily.
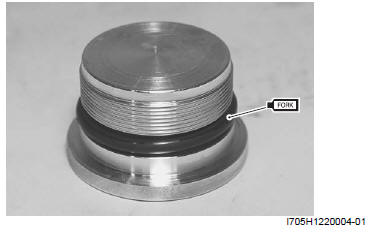
2) Replace the O-ring of the front fork cap bolt and apply fork oil.
! CAUTION Use a new O-ring to prevent oil leakage.
: Fork Oil
99000-99044-10G (FORK OIL or equivalent)
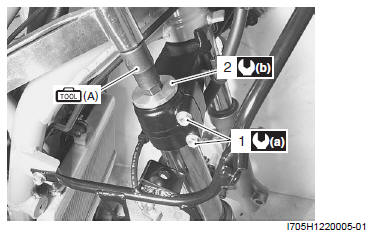
3) Install the washer and temporarily tighten the front fork cap bolt and tighten the front fork clamp bolts (1) to the specified torque.
Tightening torque
Front fork clamp bolt (a): 23 N*m (2.3 kgf-m, 16.5 lb-ft)
4) Tighten the front fork cap bolt (2) to the specified torque using the special tool.
Special tool (A): 09940-30230 (Socket hexagon (17 mm) )
Tightening torque
Front fork cap bolt (b): 45 N*m (4.5 kgf-m, 32.5 lb-ft)
5) Install the front fender.
6) Tighten the brake hose clamp bolt.
7) Connect the brake hose clamp to the front fender.
8) Install the front wheel assembly. Refer to "Front Wheel Assembly Removal and Installation".
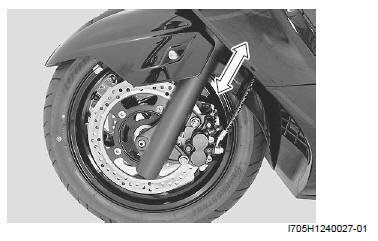
! WARNING After remounting the brake caliper, pump the brake lever until the pistons push the pads correctly.
NOTE Before tightening the front axle and front axle pinch bolts, move the front fork up and down four or five times.
See also:
 Suzuki Burgman 400 - Service manual > Front Fork Disassembly and Assembly
Refer to "Front Fork Removal and Installation". Disassembly 1) Remove the front fork spring (1).


