 Suzuki Burgman 400 - Service manual > Brake Caliper Piston Disassembly and Assembly
Refer to "Rear Brake Caliper Disassembly and Assembly".
Disassembly
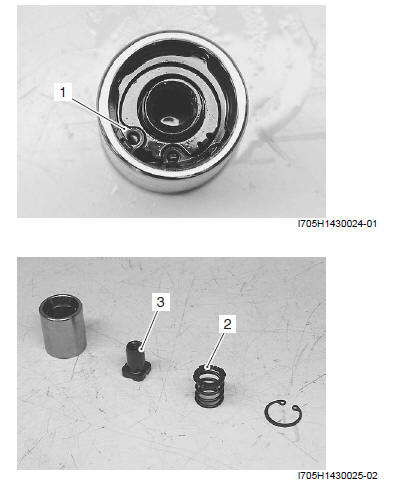
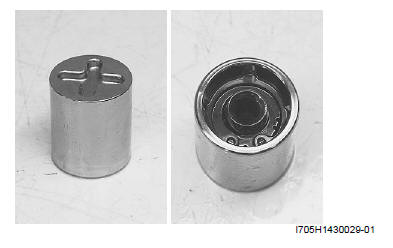
1) Remove the snap ring (1).
! CAUTION Use caution when removing the snap ring as the parts inside may fly out of position.
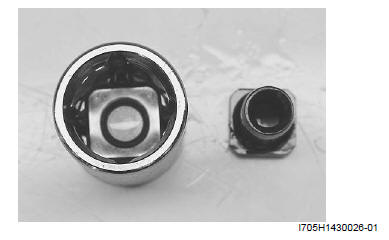
2) Remove the spring (2) and adjust nut (3).
Assembly
Assemble the brake caliper piston (bottom side) in the reverse order of disassembly. Pay attention to the following point:
- When assembling, position the adjust nut so as to fit to the seat inside the piston.
! CAUTION When installing the snap ring, use the utmost care not to allow the internal parts to pop out.
Rear Brake Caliper Parts Inspection
Refer to "Rear Brake Caliper Removal and Installation".
Inspect the following parts.
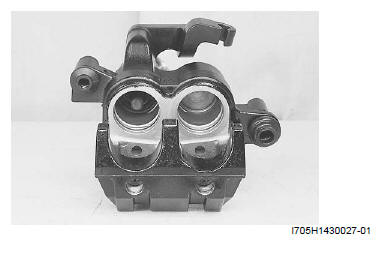
Brake Caliper Cylinder
Inspect the brake caliper cylinder sliding face and oil seal groove for wear or other damage. If any damage is found, replace the caliper with a new one.
Brake Caliper Piston
Inspect the brake caliper piston sliding face for any scratches or other damage. If any damage is found, replace the piston with a new one.
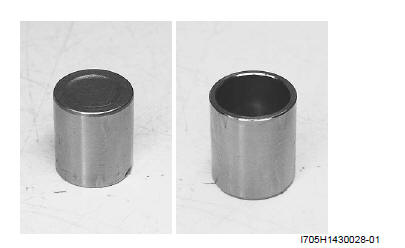
Brake Caliper Piston
Inspect the brake caliper piston sliding face and oil seal groove of the seal for wear or damage. If any damage is found, replace the piston with a new one.
Inspect the adjust nut, spring or snap ring for any scratches or other damage. If any damage is found, replace the piston with a new one.
Rear Brake Disc Removal and Installation
Removal
1) Remove the rear wheel. Refer to "Rear Wheel Assembly Removal and Installation ".
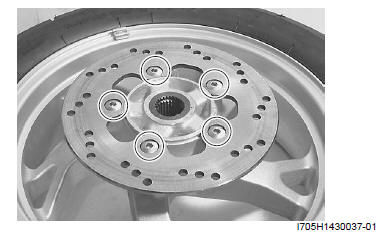
2) Remove the rear brake disc.
Installation
Refer to "Rear Brake Disc Inspection".
Install the rear brake disc in the reverse order of removal. Pay attention to the following points:
- Make sure that the brake discs are clean and free of any grease.
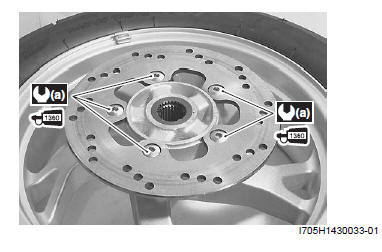
- Apply thread lock to the brake disc bolts and tighten them to the specified torque.
 : Thread lock
cement 99000-32130 (Thread Lock Cement Super 1360 or equivalent)
: Thread lock
cement 99000-32130 (Thread Lock Cement Super 1360 or equivalent)
Tightening torque
Brake disc bolt (a): 23 N*m (2.3 kgf-m, 16.5 lb-ft)
Rear Brake Disc Inspection
Brake Disc Thickness
Check the brake disc for damage or cracks and measure the thickness using the micrometer.
Replace the brake disc if the thickness is less than the service limit or if defect is found.
Special tool (A): 09900-20205 (Micrometer (0 - 25 mm) )
Brake disc thickness
Service limit (Rear): 4.5 mm (0.18 in)
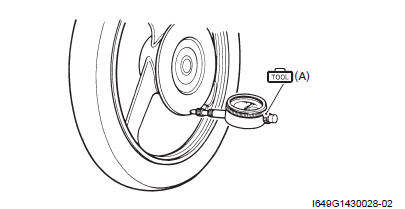
Brake Disc Runout
1) Remove the rear brake caliper. Refer to "Rear Brake Caliper Removal and Installation".
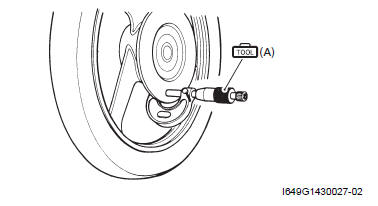
2) Measure the runout using the dial gauge. Replace the disc if the runout exceeds the service limit.
Special tool
(A): 09900-20607 (Dial gauge (1/100 mm, 10 mm) )
: 09900-20701 (Magnetic stand)
Brake disc runout
Service limit: 0.30 mm (0.012 in)
3) Install the rear brake caliper. Refer to "Rear Brake Caliper Removal and Installation".
Specifications
Tightening Torque Specifications
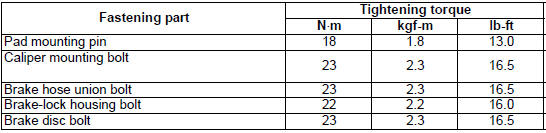
NOTE The specified tightening torque is also described in the following.
Reference: For the tightening torque of fastener not specified in this section, refer to "Tightening Torque Specifications".
Special Tools and Equipment
Recommended Service Material
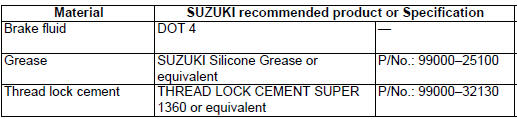
NOTE Required service material is also described in the following.
Special Tool
 09900-20205
Micrometer (0 - 25 mm)
09900-20205
Micrometer (0 - 25 mm)
 09900-20607
Dial gauge (1/100 mm, 10 mm)
09900-20607
Dial gauge (1/100 mm, 10 mm)
 09900-20701
Magnetic stand
09900-20701
Magnetic stand
See also:
 Suzuki Burgman 400 - Service manual > Rear Brake Caliper Removal and Installation
Removal 1) Drain the brake fluid. Refer to "Brake Fluid Replacement". 2) Remove the brake hose from the caliper by removing the union bolt (1) and catch the brake fluid in a suitable receptacle.


