 PIAGGIO Beverly 300ie - Service manual > Pre-delivery
Carry out the listed tests before delivering the vehicle.
Warning - Handle fuel with care.
Aesthetic inspection
Appearance check:
- Paintwork
- Fitting of plastics
- Scratches
- Dirt
Tightening torques inspection
- Visually check that there is a yellow mark on the following clamps:
FRONT SUSPENSION
- Front wheel pin nut.
- Screws fixing wheel pin on right fork leg.
FRONT BRAKE
- Screws fixing front brake callipers to fork.
- Brake pipes / front brake calliper coupling.
REAR SUSPENSION
- Rear wheel tightening screws.
- Lower shock absorber retainer.
- Nuts fixing muffler supporting arm - engine.
- Screws fixing muffler to supporting arm.
- Rear wheel pin nut.
REAR BRAKE
- Screws fixing rear brake calliper to supporting plate.
- Brake pipe to rear brake calliper coupling.
- Screws fixing supporting plate to engine.
Electrical system
- Main switch
- Lights: high-beam lights, low-beam lights, taillights (front and rear) and relevant warning lights - Headlight adjustment according to the regulations currently in force
- Front and rear stop light buttons and relative light
- Turn indicators and relative telltales
- Instrument lighting
- instruments: fuel and temperature indicator
- Instrument panel lights
- Horn
- Electrical start up
- Engine stopping with emergency stop switch
- electric saddle opening button
CAUTION
TO ENSURE MAXIMUM PERFORMANCE, THE BATTERY MUST BE CHARGED BEFORE USE.
INADEQUATE CHARGING OF THE BATTERY WITH A LOW LEVEL OF ELECTROLYTE BEFORE IT IS FIRST USED SHORTENS THE LIFE OF THE BATTERY.
CAUTION
WHEN INSTALLING THE BATTERY, ATTACH THE POSITIVE LEAD FIRST AND THEN THE NEGATIVE ONE.
WARNING
BATTERY ELECTROLYTE IS TOXIC AND IT MAY CAUSE SERIOUS BURNS. IT CONTAINS SULPHURIC ACID. AVOID CONTACT WITH YOUR EYES, SKIN AND CLOTHING.
IN CASE OF CONTACT WITH YOUR EYES OR SKIN, RINSE WITH ABUNDANT WATER FOR ABOUT 15 MINUTES AND SEEK IMMEDIATE MEDICAL ATTENTION.
IF IT ACCIDENTALLY SWALLOWED, IMMEDIATELY DRINK LARGE QUANTITIES OF WATER OR VEGETABLE OIL. SEEK IMMEDIATE MEDICAL ATTENTION.
BATTERIES PRODUCE EXPLOSIVE GASES; KEEP THEM AWAY FROM NAKED FLAMES, SPARKS. IF THE BATTERY IS CHARGED IN A CLOSED PLACE, TAKE CARE TO ENSURE ADEQUATE VENTILATION. ALWAYS PROTECT YOUR EYES WHEN WORKING CLOSE TO BATTERIES.
KEEP OUT OF THE REACH OF CHILDREN
CAUTION
NEVER USE FUSES WITH A CAPACITY HIGHER THAN THE RECOMMENDED CAPACITY. USING A FUSE OF UNSUITABLE RATING MAY SERIOUSLY DAMAGE THE VEHICLE OR EVEN CAUSE A FIRE.
Levels check
Level check:
- Hydraulic brake system liquid level.
- Rear hub oil level
- Engine coolant level
- Engine oil level
Road test
Test ride
- Cold start
- Instrument operations
- Response to the throttle control
- Stability on acceleration and braking
- Rear and front brake efficiency
- Rear and front suspension efficiency
- Abnormal noise
Static test
Static control after the test ride:
- Hot engine restart
- Minimum seal (turning the handlebar)
- Uniform steering rotation
- Possible losses
- electric radiator fan operation
CAUTION
CHECK AND ADJUST TYRE PRESSURE WITH TYRES AT AMBIENT TEMPERATURE.
CAUTION
NEVER EXCEED THE RECOMMENDED INFLATION PRESSURES OR TYRES MAY BURST.
Functional inspection
Functional Checks:
- Hydraulic braking system: lever travel
- Clutch: proper functioning check
- Engine: proper general functioning and no abnormal noise check
- Other: papers check, chassis and engine number check, tools and equipment, licence plate fitting, lock check, tyre pressure check, rear-view mirror and any accessory fitting
Instruments start-up
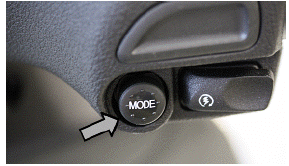
Use the switch "MODE" to "ODO" mode
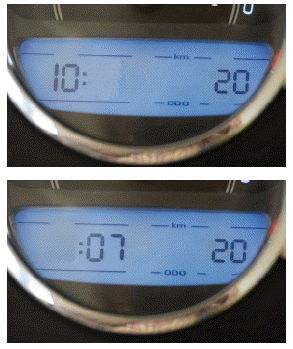
Hold the switch "MODE" for more than 3 seconds, the hours will be displayed. Hours will increase each time the "MODE" button is pressed.
Once the hour is adjusted, hold the switch "MODE" more than 3 seconds to display the minutes. Minutes will increase each time the "MODE" button is pressed.
If no key is pressed for 3 seconds, the system will leave the clock adjustment mode.
WARNING
FOR SAFETY REASONS, CLOCK ADJUSTMENT IS POSSIBLE EXCLUSIVELY WITH VEHICLE SPEED EQUAL TO 0 Km/h.

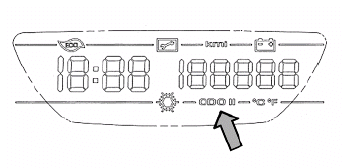
TRIP COUNTER PARTIAL RESET
In the partial trip counter function, press and hold the MODE button for longer than 3 seconds and it will reset.
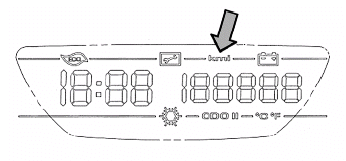
SELECT MILES - KM
When using the function measuring the voltage of the battery, holding down the MODE button for longer than 10 seconds will switch between reading in kilometres or miles for the odometer.
For the first 5 seconds the bearing will not give any signal, for the next 5 seconds the message of the unit of measurement (Km or miles) currently in use will blink at a frequency of 1Hz. If the button is released before 10 seconds the measurement unit is not changed.
Time
Engine
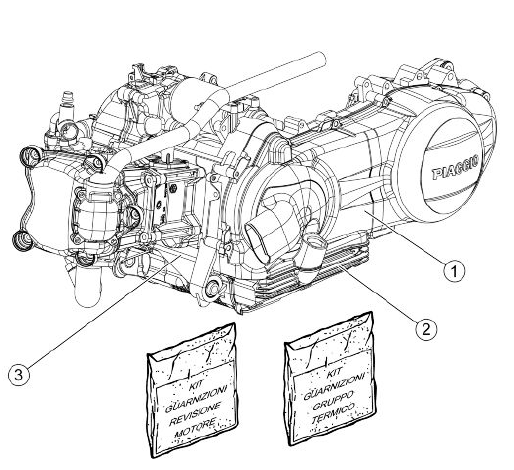
ENGINE

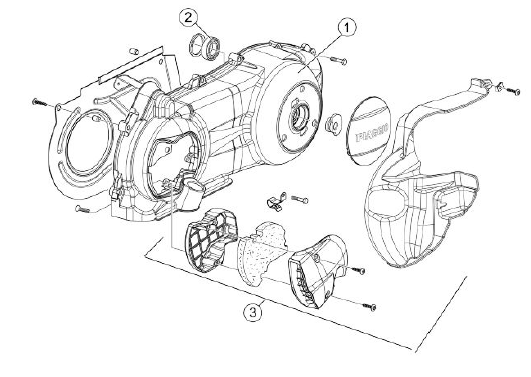
Crankcase
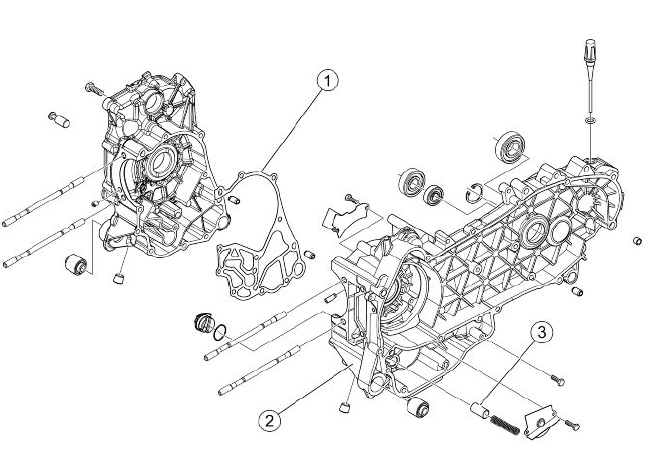
CRANKCASE

Crankshaft
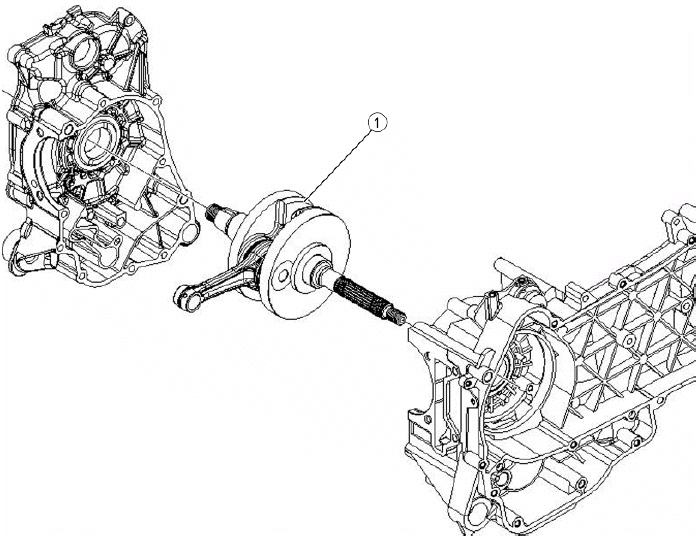
CRANKSHAFT

Cylinder assy.
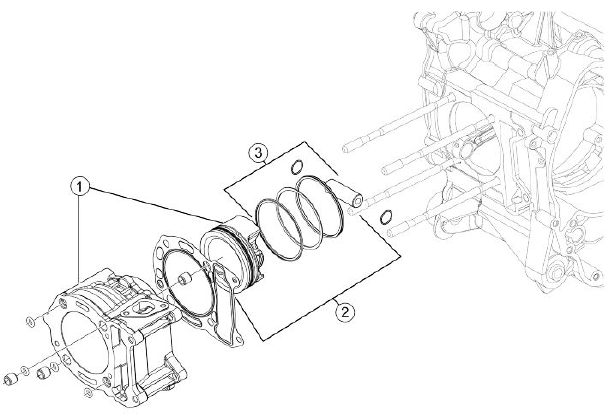
CYLINDER - PISTON

Cylinder head assy.

VALVE HEAD
Rocker arms support assy.
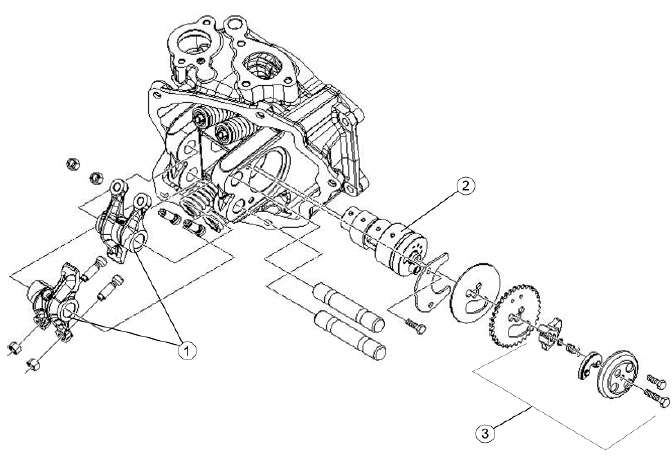
CAMSHAFT

Cylinder head cover
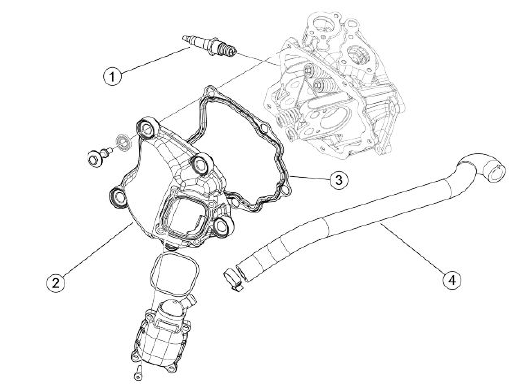
HEAD COVER

Oil filter

OIL FILTER

Flywheel cover
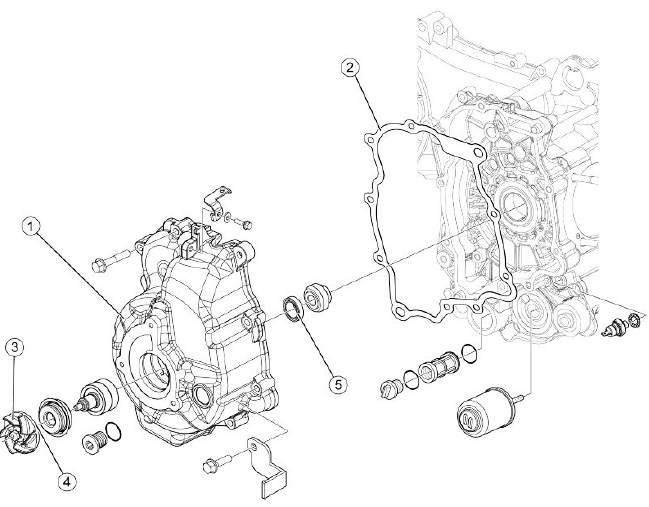
FLYWHEEL COVER

Driven pulley
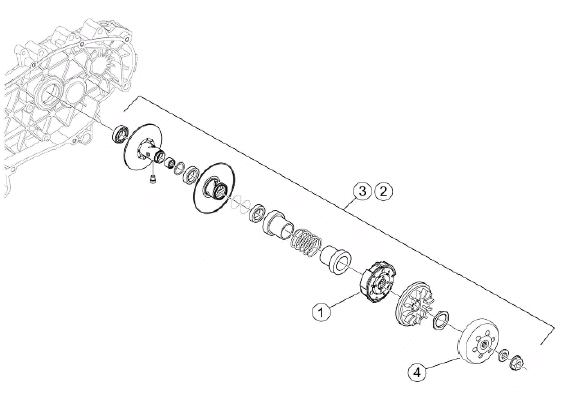
DRIVEN PULLEY

Oil pump
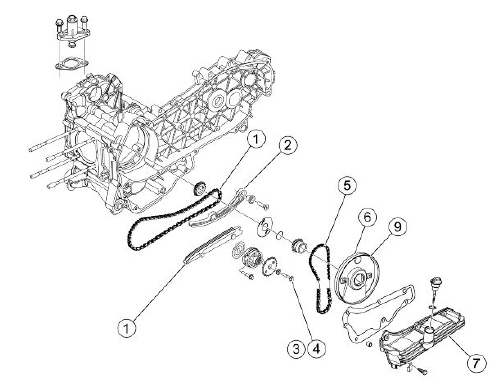
OIL PUMP
Final gear assy.
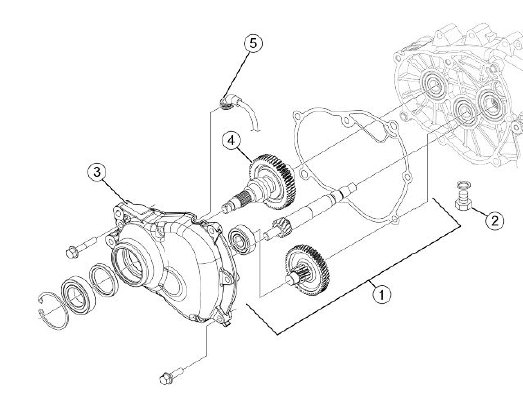
FINAL REDUCTION

Driving pulley
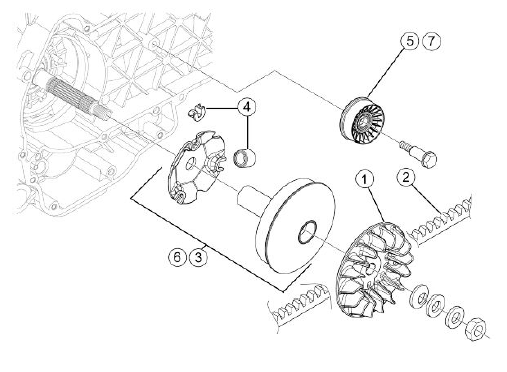
DRIVING PULLEY

Transmission cover
TRANSMISSION COVER

Water pump
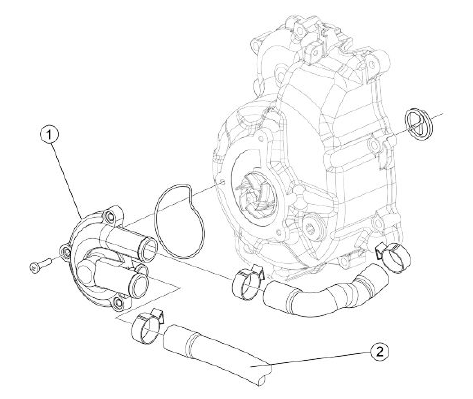
WATER PUMP

Starter motor
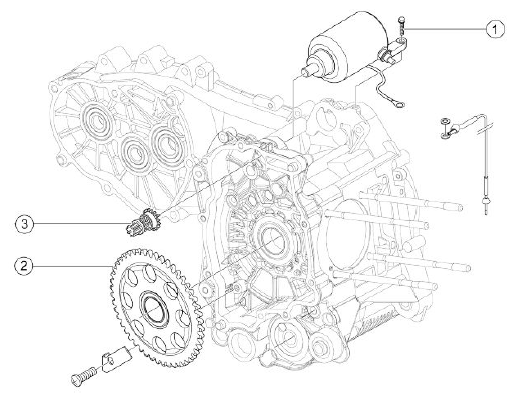
ELECTRIC STARTER

Flywheel magneto
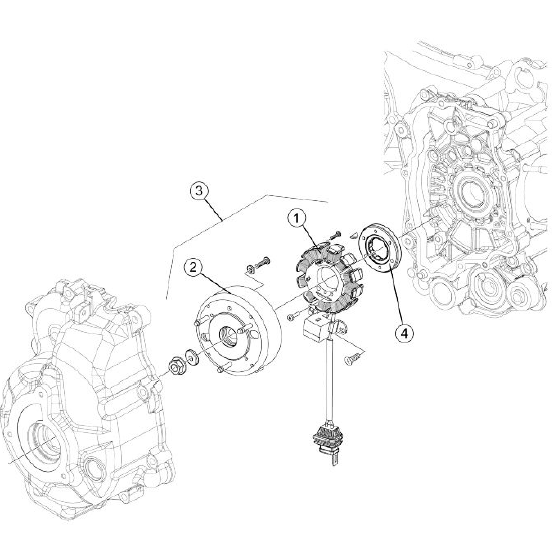
MAGNETO FLYWHEEL

Butterfly valve
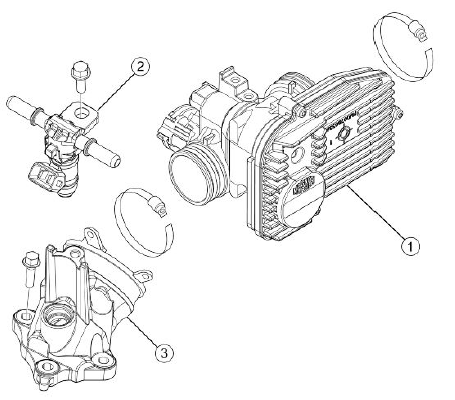
THROTTLE BODY

Exhaust pipe
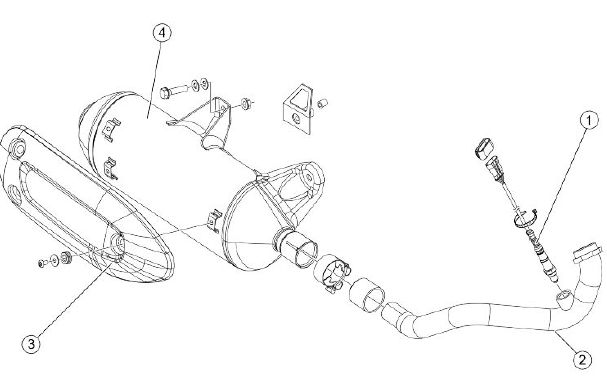
SILENCER

Air cleaner
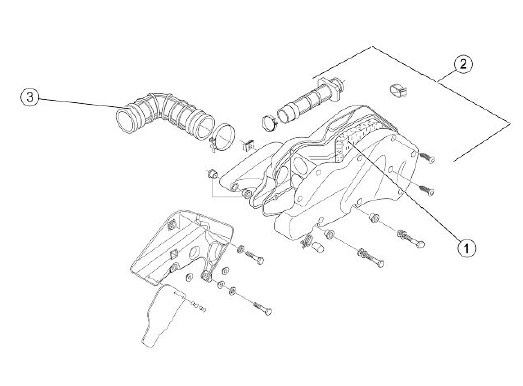
AIR CLEANER

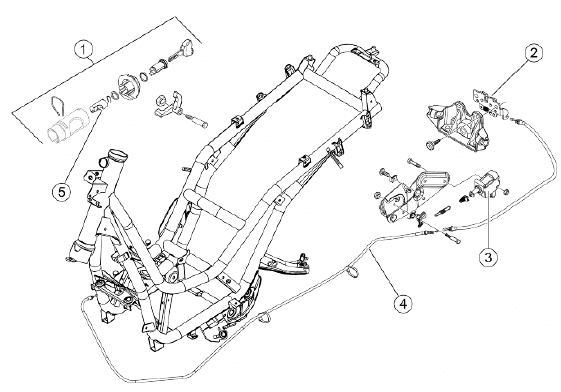
Frame
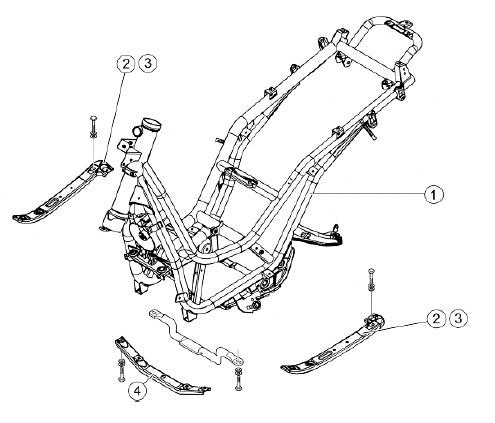
CHASSIS

Centre-stand
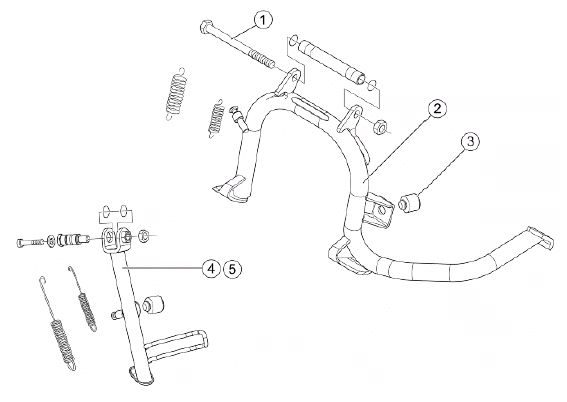
STAND

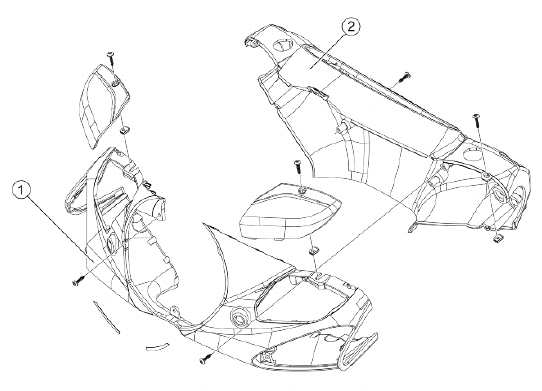
Legshield spoiler
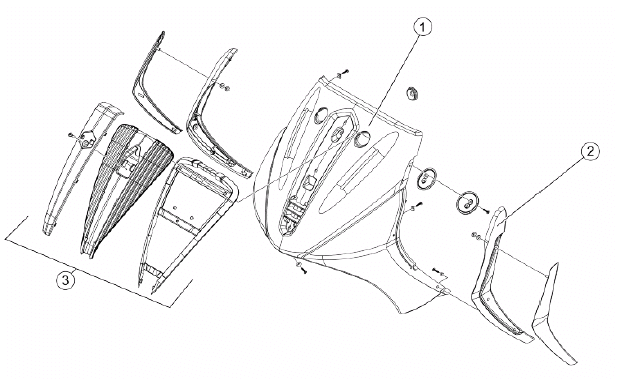
LEGSHIELD - SPOILER

Side fairings
SIDE COVERS

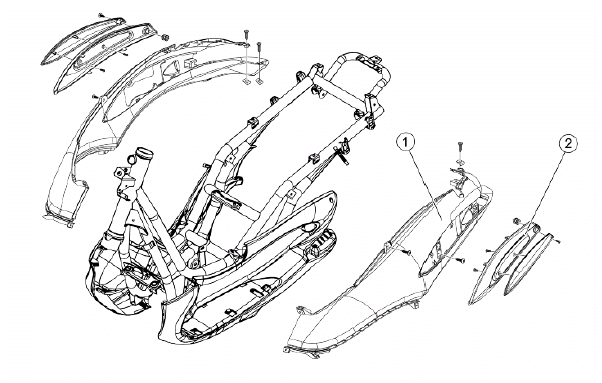
Rear cover

REAR SHIELD

Central cover
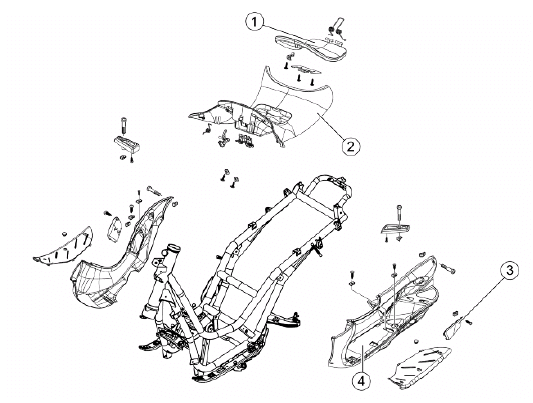
CENTRAL COVER

Underseat compartment
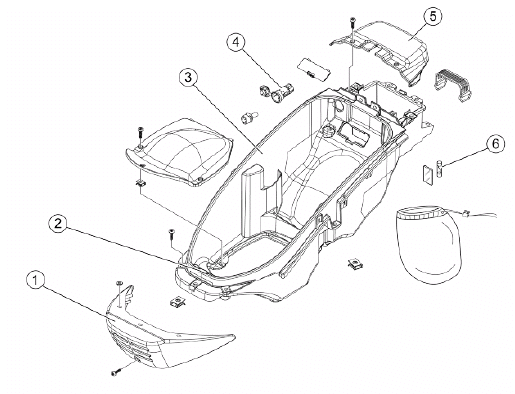
HELMET COMPARTMENT
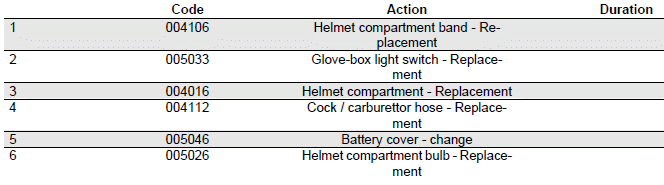
Plate holder
LICENSE PLATE HOLDER

Mudguard

MUDGUARDS

Fuel tank

FUEL TANK

Rear shock-absorber
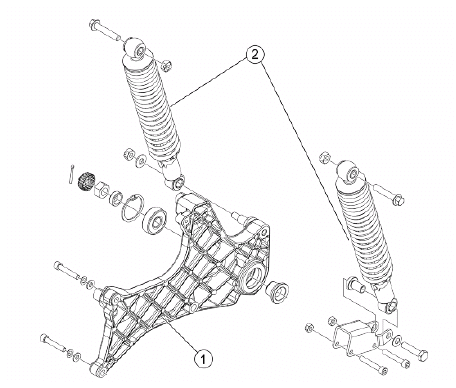
REAR SHOCK ABSORBER

Handlebar covers
HANDLEBAR COVERS

Handlebar components
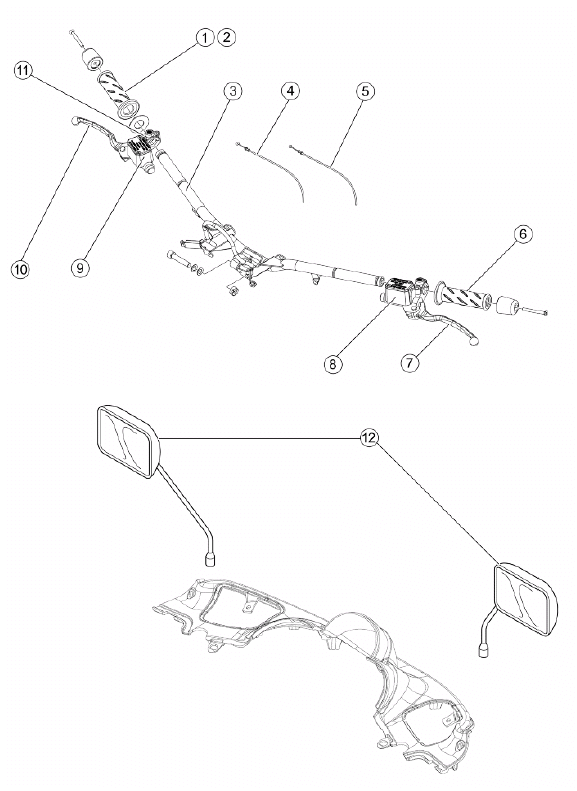
HANDLEBAR COMPONENTS

Swing-arm
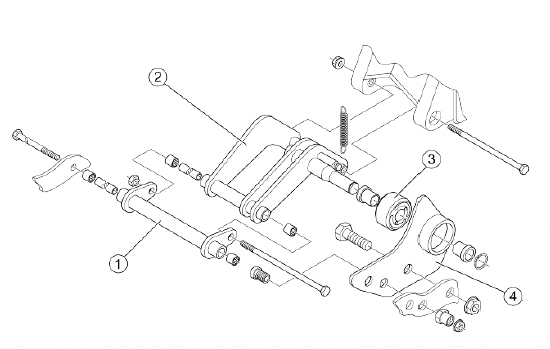
SWINGING ARM

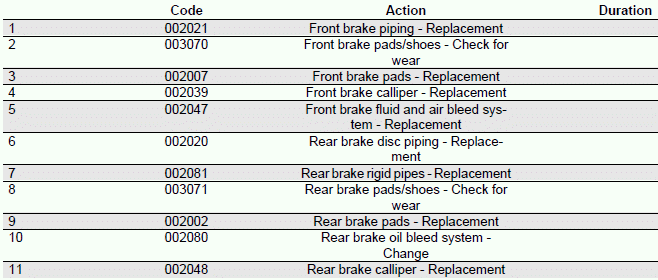
Brake hoses
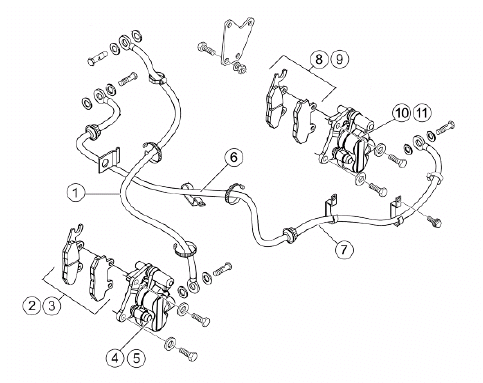
BRAKE PIPING
Seat
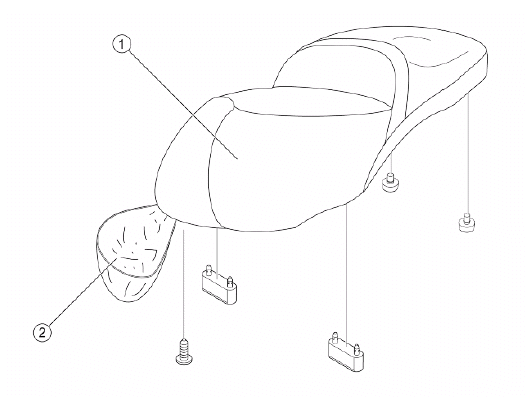
SADDLE

Instrument panel
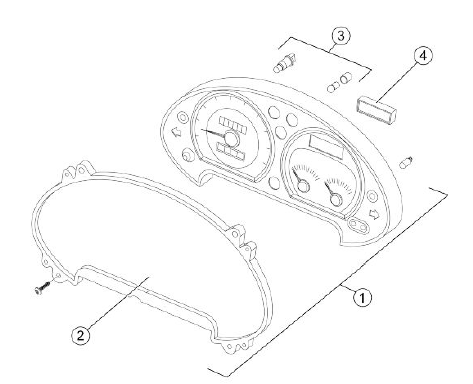
INSTRUMENT PANEL

Rear rack
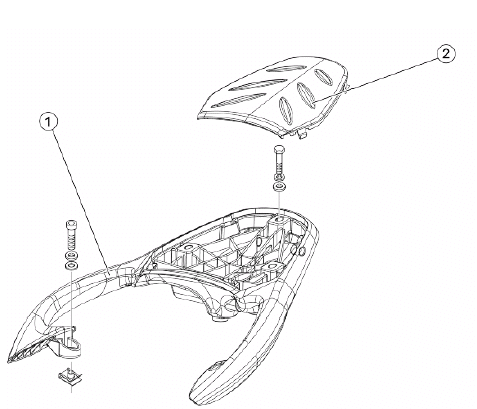
LUGGAGE RACK

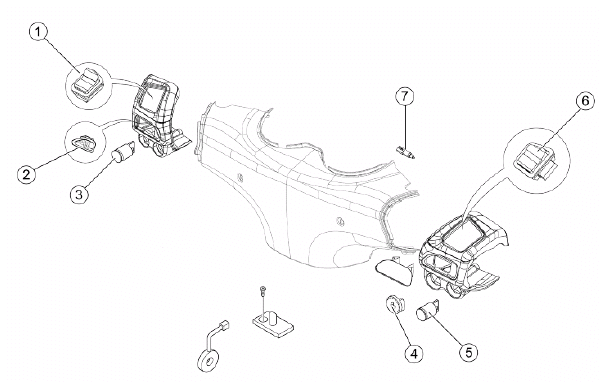
Locks
LOCKS

Turn signal lights
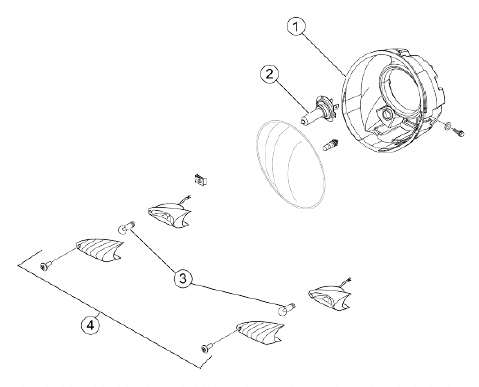
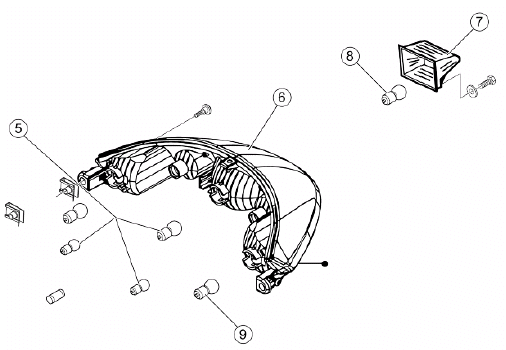
TURN INDICATOR LIGHTS

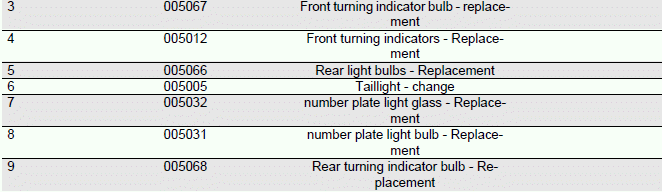
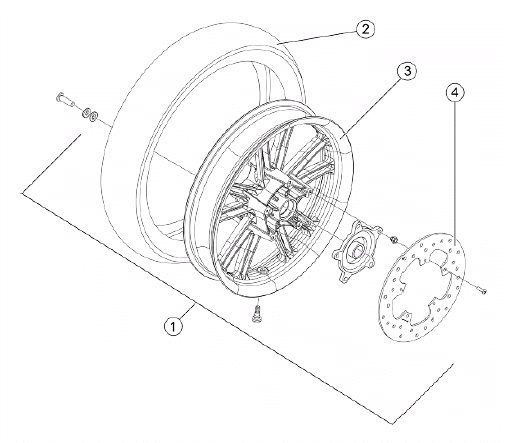
Front wheel
FRONT WHEEL

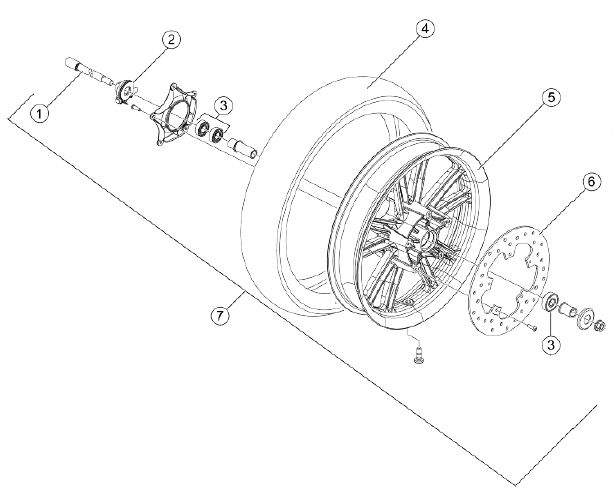
Rear wheel
REAR WHEEL

Fuel pump
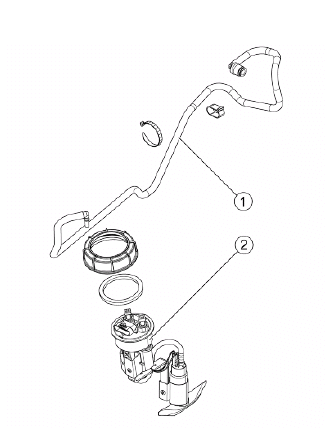
FUEL PUMP

Electric devices
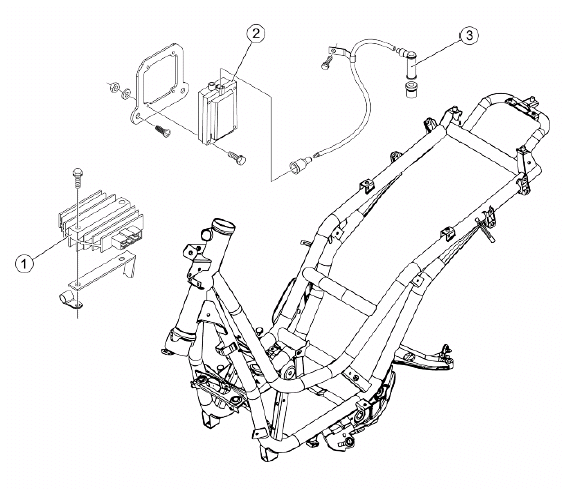
VOLTAGE REGULATOR

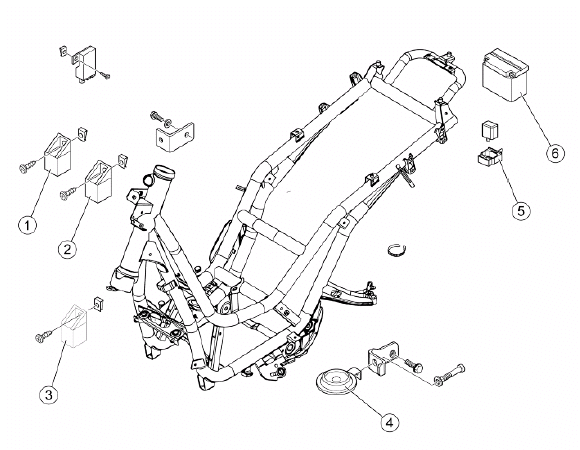
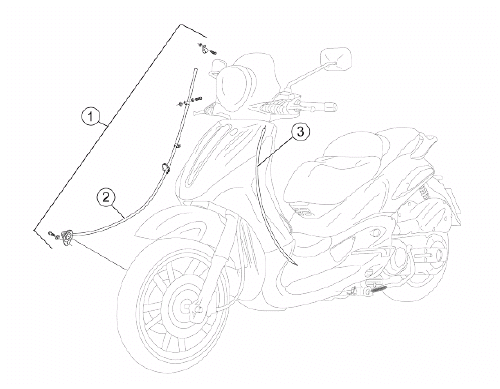
REMOTE CONTROLS

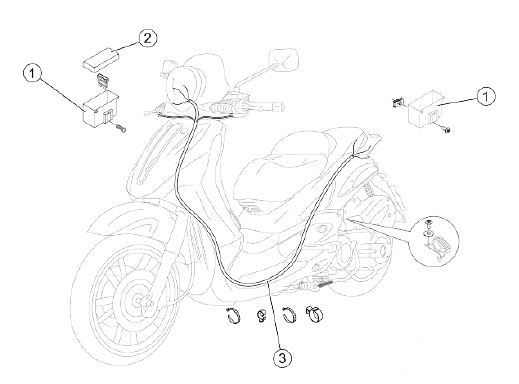
CABLE ASSEMBLY

Electronic controls
ELECTRIC CONTROLS

Transmissions
TRANSMISSION

Front suspension
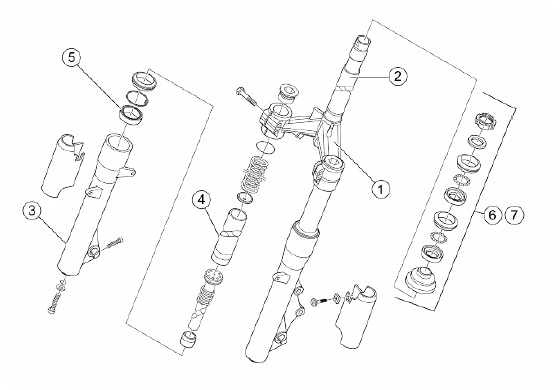
FRONT SUSPENSION

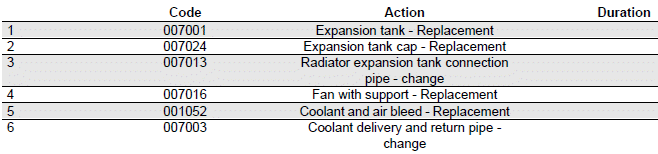
Cooling system
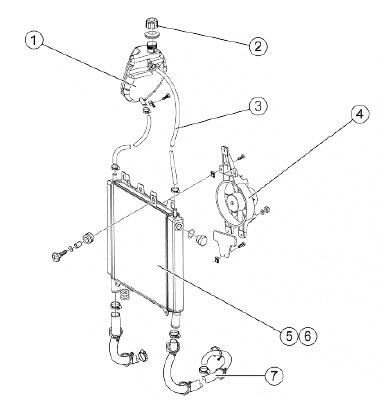
RADIATOR
Windscreen
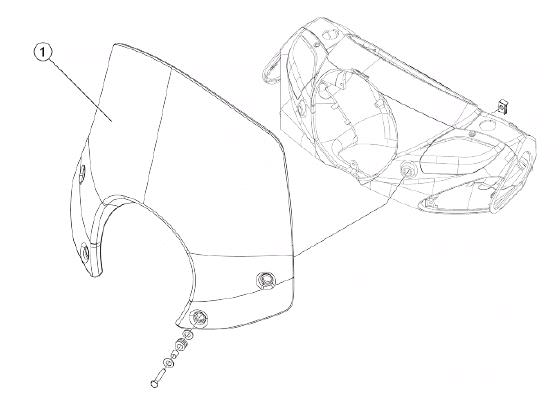
WINDSCREEN

Stickers
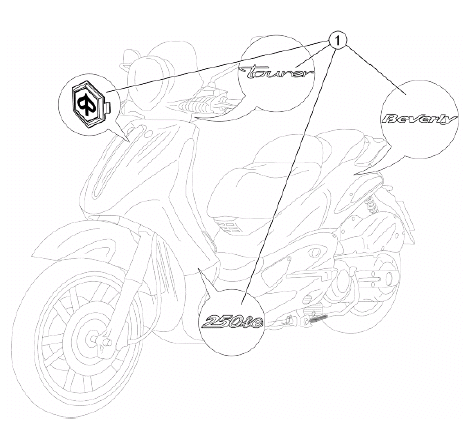
TRANSFERS

See also:
 PIAGGIO Beverly 300ie - Service manual > Front mudguard
To remove the front mudguard, proceed as follows: On both sides of the vehicle, unscrew the indicated screws and remove the stanchion guard; Unscrew the three bolts indicated inside the mudguard; Detach the brake hose from the two indicated seats and remove the mudguard, pulling from the front.


