 PIAGGIO Beverly 300ie - Owner's Manual > Front light group
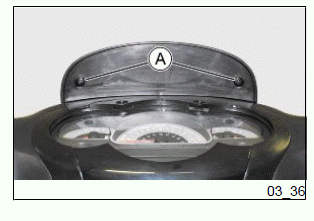
To remove the front headlight assembly, proceed as follows:
- Unscrew the two screws "A" and remove the pressure covering
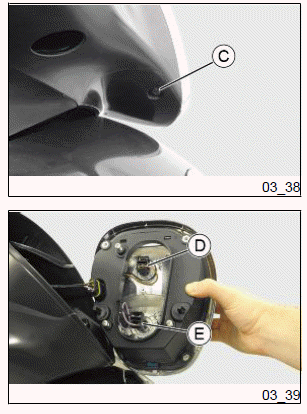
- Unscrew the two upper screws "E" fastening the headlight assembly
- Working on both sides of the vehicle, unscrew the lower fixing screws "C" and remove the headlight. Remove the rubber protection.
This gives access to the bulbs.
To replace the low-beam light act on the lamp holder "D". To replace the high-beam light act on the lamp holder "E" unhooking the relevant pin.
To reassemble, repeat the operation but in reverse order.
WARNING
HIGH- AND LOW-BEAM BULBS ARE HALOGEN TYPE: DO NOT TOUCH THEM WITH YOUR FINGERS TO AVOID DAMAGING THEIR FUNCTION.
CAUTION
DO NOT LEAN OR CARRY OBJECTS OR CLOTHING OVER THE FRONT HEADLIGHTS.
IT CAN CAUSE OVERHEATING AND CONSEQUENTIAL FUSING OR DAMAGE TO THE GLASS.
Headlight adjustment
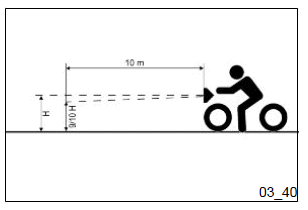
Proceed as follows:
- Position the vehicle in running order and with the tyres inflated to the prescribed pressure, onto a flat surface, 10 m away from a half-lit white screen; ensure that the longitudinal axis of the vehicle is perpendicular to the screen;
- Turn on the headlight and check that the borderline of the projected light beam on the screen is not higher than 9/10 or lower than 7/10 of the distance from the ground to the centre of the vehicle headlamp;
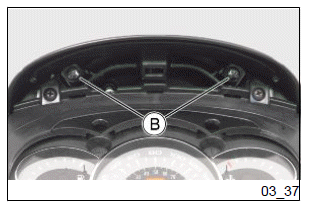
- Otherwise, adjust the headlight. Unscrew the two screws "A" and remove the pressure covering. Screw in the screw "B" to lower the light beam, unscrew the screw "B" to raise the light beam.
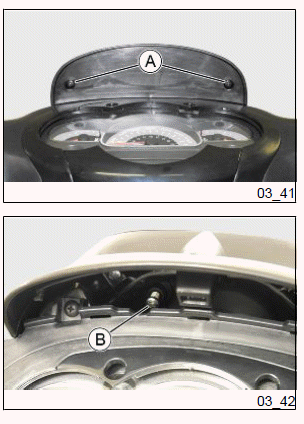
N.B.
THE ABOVE PROCEDURE COMPLIES WITH THE EUROPEAN STANDARDS REGARDING MAXIMUM AND MINIMUM HEIGHT OF LIGHT BEAMS. REFER TO THE STATUTORY REGULATIONS IN FORCE IN EVERY COUNTRY WHERE THE VEHICLE IS USED.
Front direction indicators
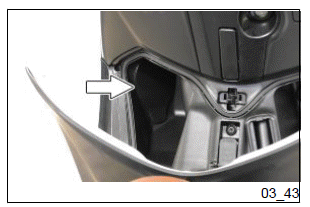
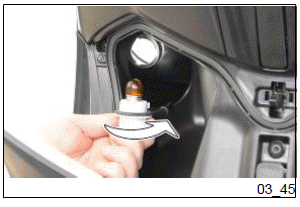
To replace the indicator bulbs proceed as follows:
- Open the front case
- Remove the rubber protection
- Remove the lamp holder, rotating it towards the inside of the vehicle
- Lightly press the lamp and turn it anticlockwise and remove it.
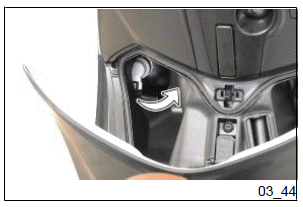
WARNING
THE DAYLIGHT RUNNING LIGHTS PRESENT IN THE SAME GROUP ARE "LED" TYPES. IN CASE OF MALFUNCTIONING, AS THE REMOVAL IS PARTICULARLY DIFFICULT, WE ADVISE ADDRESSING AN Authorised PIAGGIO Service Centre FOR THE REPLACEMENT.
See also:
 PIAGGIO Beverly 300ie - Owner's Manual > Fuses
The electrical system is equipped with 6 protection fuses located below the saddle. Open the saddle as described above. Unscrew the three screws "A" and remove the cover "B" The chart shows the position and specifications of the fuses in the vehicle.
 PIAGGIO Beverly 300ie - Owner's Manual > Rear optical unit
To replace the indicator bulbs proceed as follows: Open the saddle Remove the rubber protection Remove the lamp holder turning it towards the base Lightly press the lamp and turn it anticlockwise and remove it.


